
When your Facebook inbox gets busy, you don’t have to answer every message yourself — and you should never hand your own password to a helper. Team management gives each person on your team their own login, and lets you decide exactly which Facebook pages they can see and what they’re allowed to do there. This guide walks you through it, step by step.
What team management does
A team member is a separate login inside your workspace. You create it, you control it, and you can switch it off at any time. For each member you choose:
Modules — turn on Campaigns (create and send bulk messages), Inbox (read and reply to conversations), or both.
Page access — tick the Facebook pages they may work on. Everything on unticked pages stays invisible to them, including leads, conversations, and bulk messages.
You stay the owner. Only you can connect or disconnect Facebook, buy message packages, or manage the team itself. Team members can view the workspace message balance, but they can never spend your money or change your account.
What you need before you start
You are signed in as the workspace owner (team members can’t manage the team).
At least one Facebook page is connected to your workspace.
The member’s email address, and a password you’ll set for them (at least 8 characters).
Step 1: Open the Team page
Sign in to Page Interact and click Team in the left sidebar.

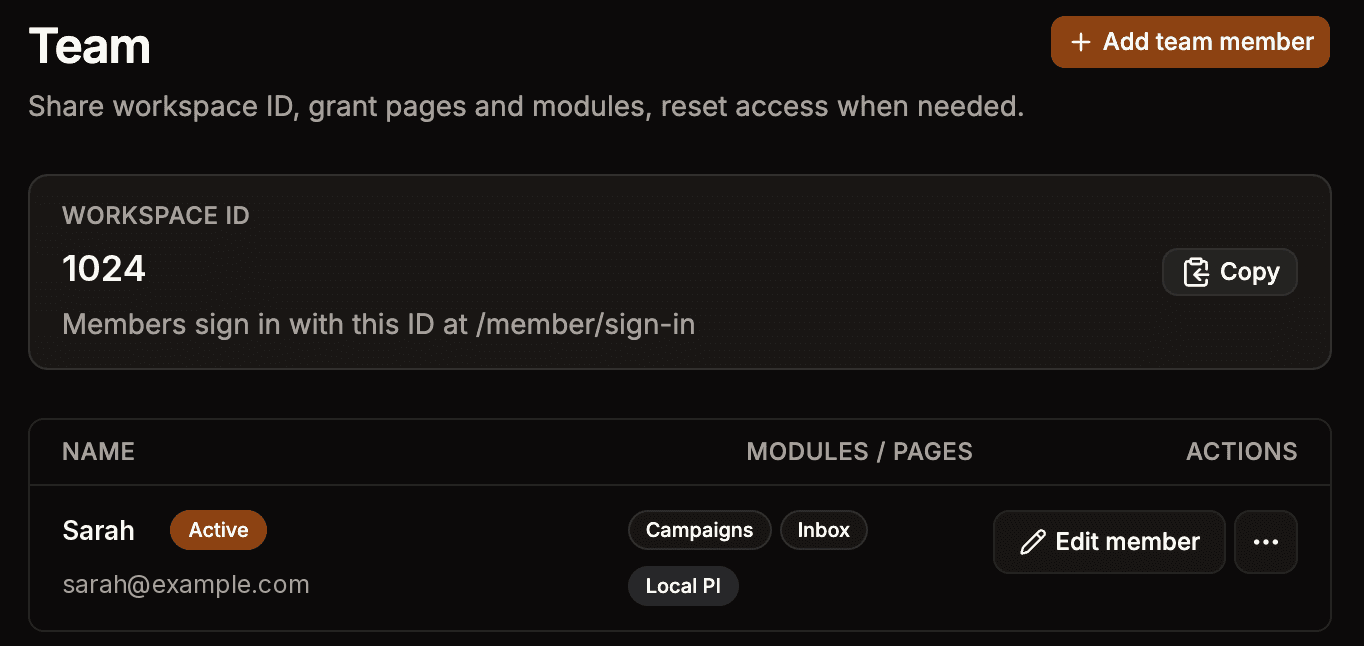
The Team page opens with your workspace ID at the top and an Add team member button in the corner. Click it.

Step 2: Enter the member’s details
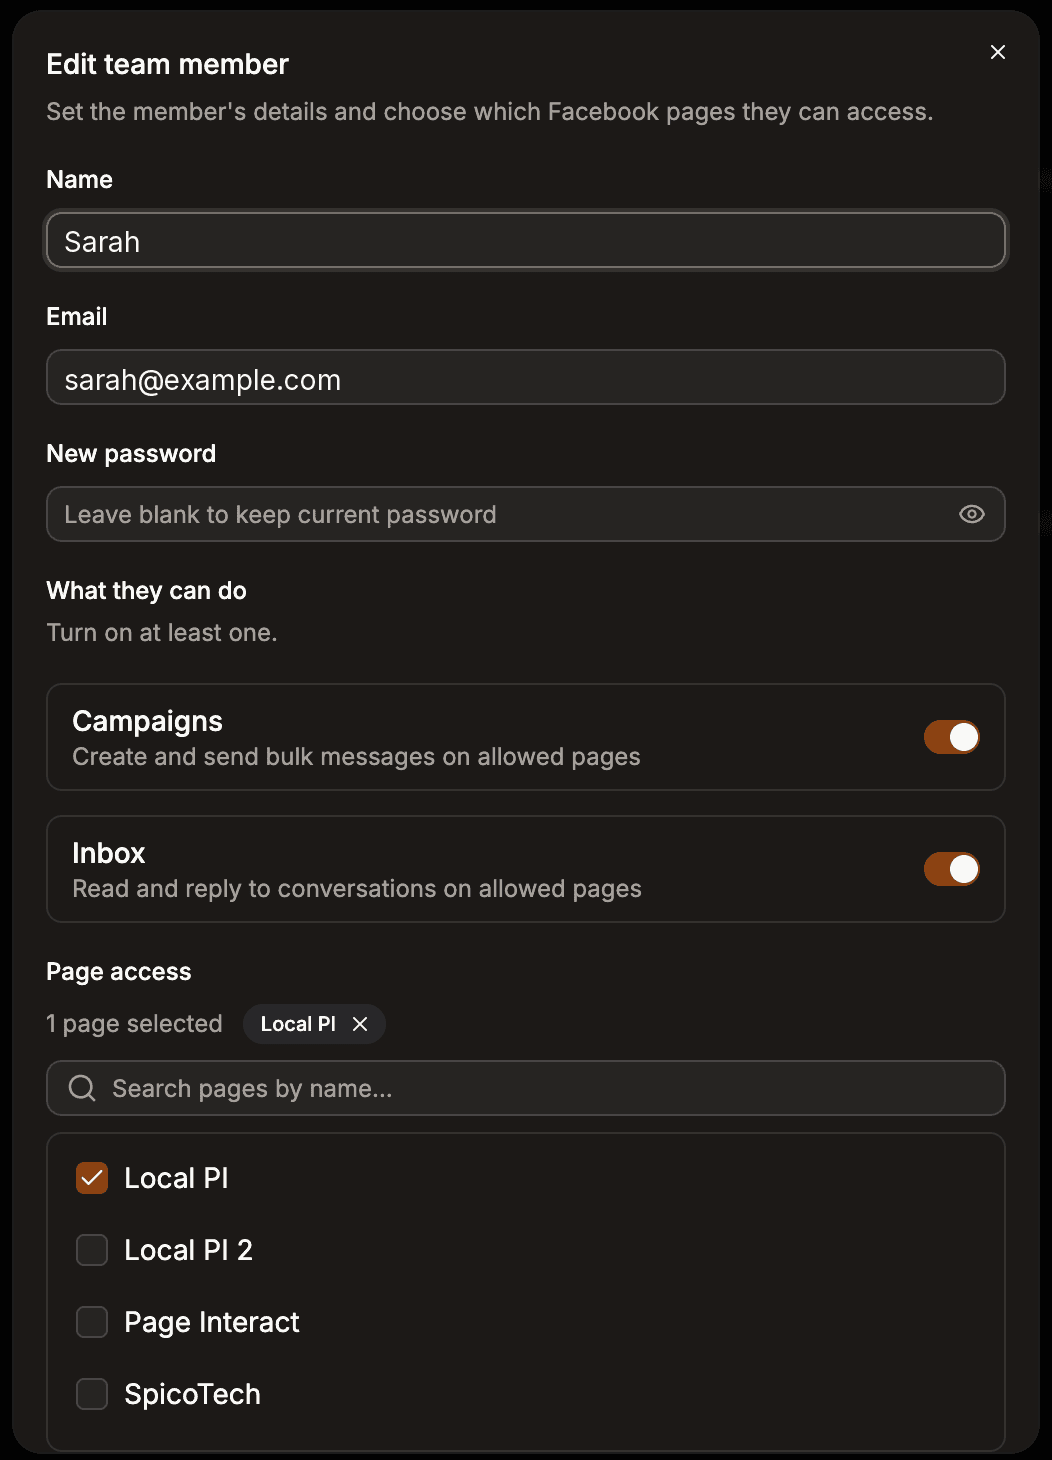
Fill in the member’s Name, Email, and a Password. You are creating this password for them — pick something strong, at least 8 characters. They can change it themselves later.

The email must be unique inside your workspace. Members can’t change their own email later, but you can edit it for them at any time.
Step 3: Choose modules and page access
Under What they can do, turn on at least one module:
Campaigns — create and send bulk messages on allowed pages.
Inbox — read and reply to conversations on allowed pages.
Under Page access, search and tick the Facebook pages this member should see. A support agent might get one page; a manager might get all of them. When you’re done, click Create member.
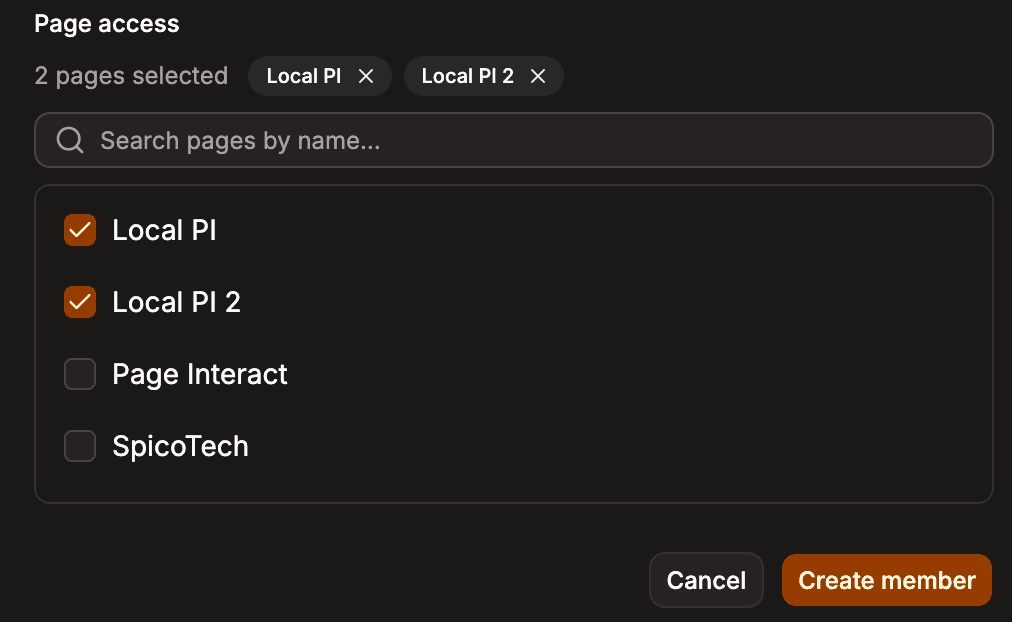
Page Interact may show a Confirm it’s you box before saving — enter your password or your 6-digit authenticator code. That’s a normal security step for team changes.
Step 4: Share the sign-in details
As soon as the member is created, a Share sign-in details box appears with the three things they need: their email, their password, and your workspace ID. Click Copy all and send the details to them privately — for example in a direct WhatsApp message.
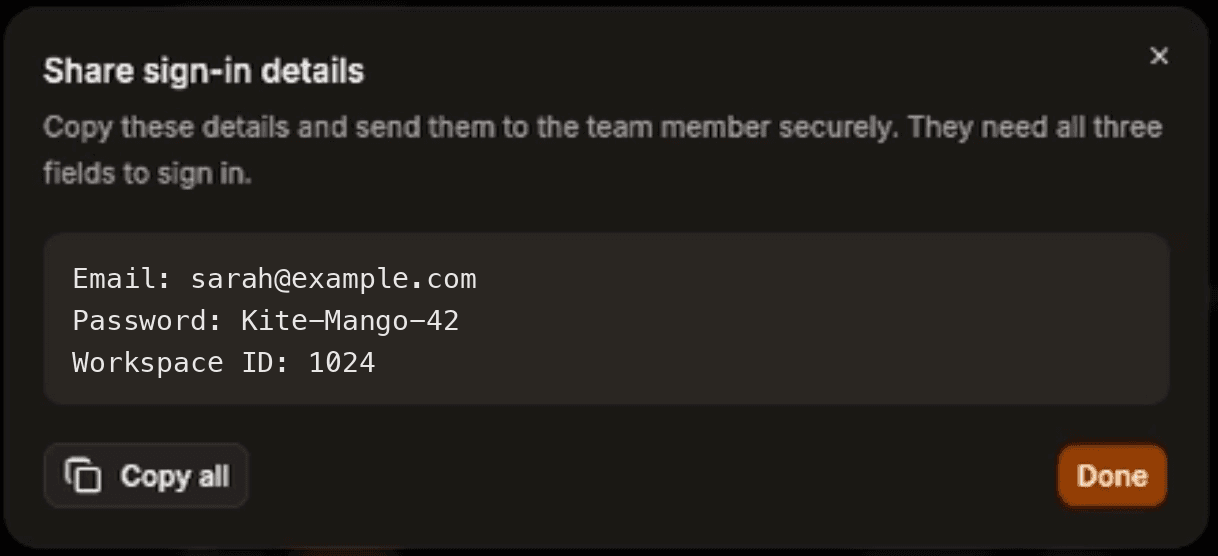
Important: Page Interact does not email these details to the member — sharing them is up to you. The password is visible only in this box, one time. If it gets lost, you can always set a new one with Reset password.
How team members sign in
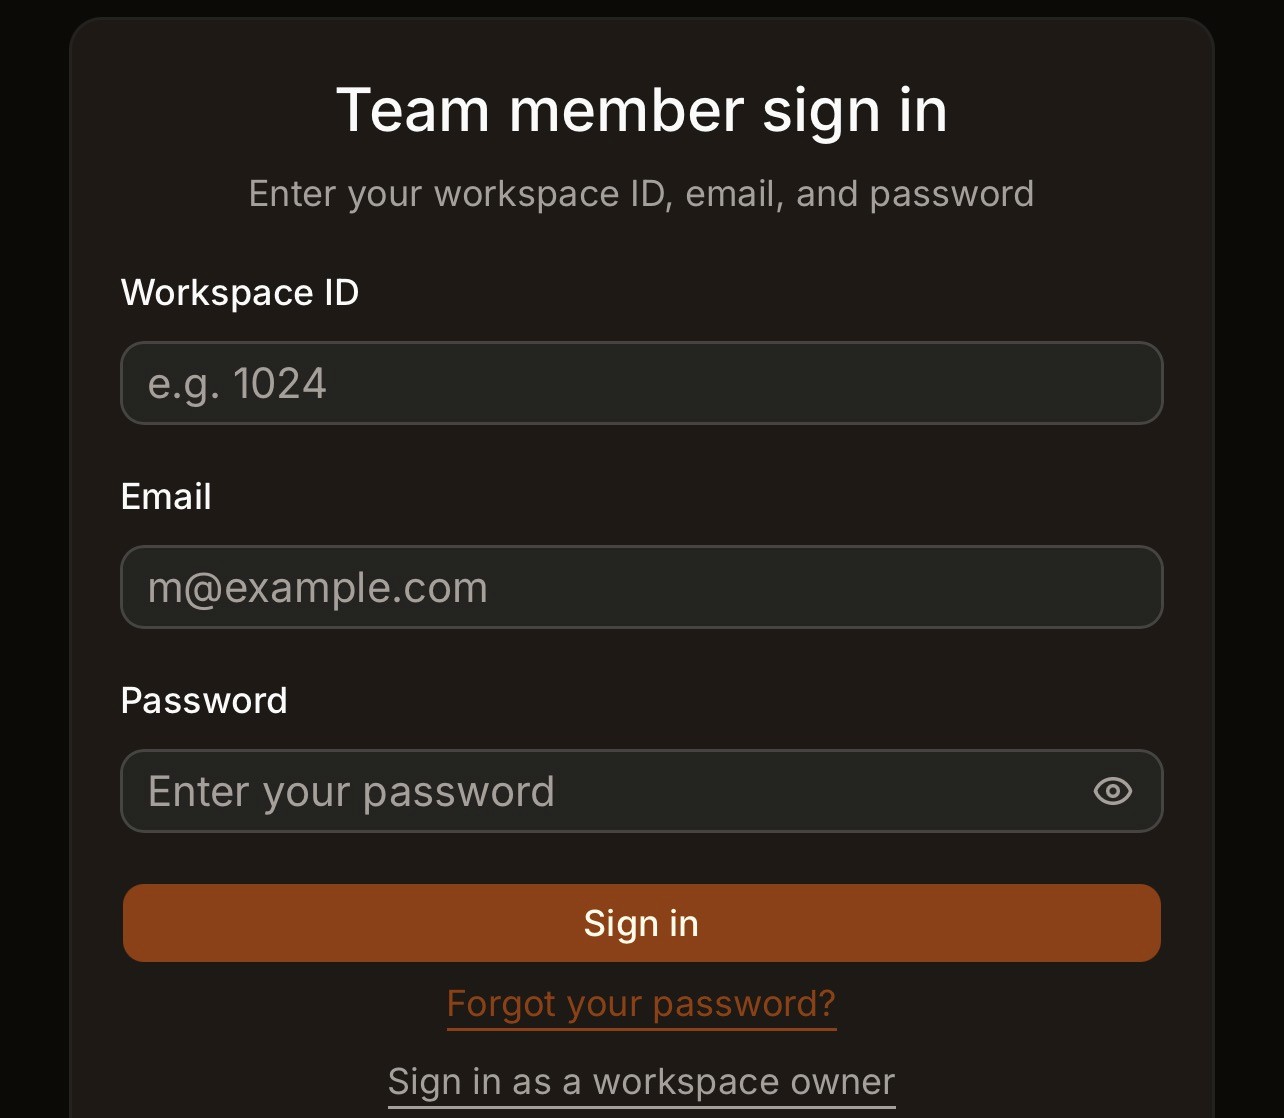
Team members use their own sign-in page: app-v2.pageinteract.com/member/sign-in. They enter the workspace ID, their email, and their password — all three are required.
Your workspace ID is always visible at the top of the Team page with a Copy button, so you never have to remember it.
If a member forgets their password, they can click Forgot your password? on the sign-in page to get a reset link by email — or you can reset it for them from the Team page.
Edit a member, reset a password, or remove one
Every member row on the Team page has an Edit member button. Use it to change their name, email, modules, or page access — changes apply immediately, no re-invite needed.
The ⋯ menu next to it holds the rest:
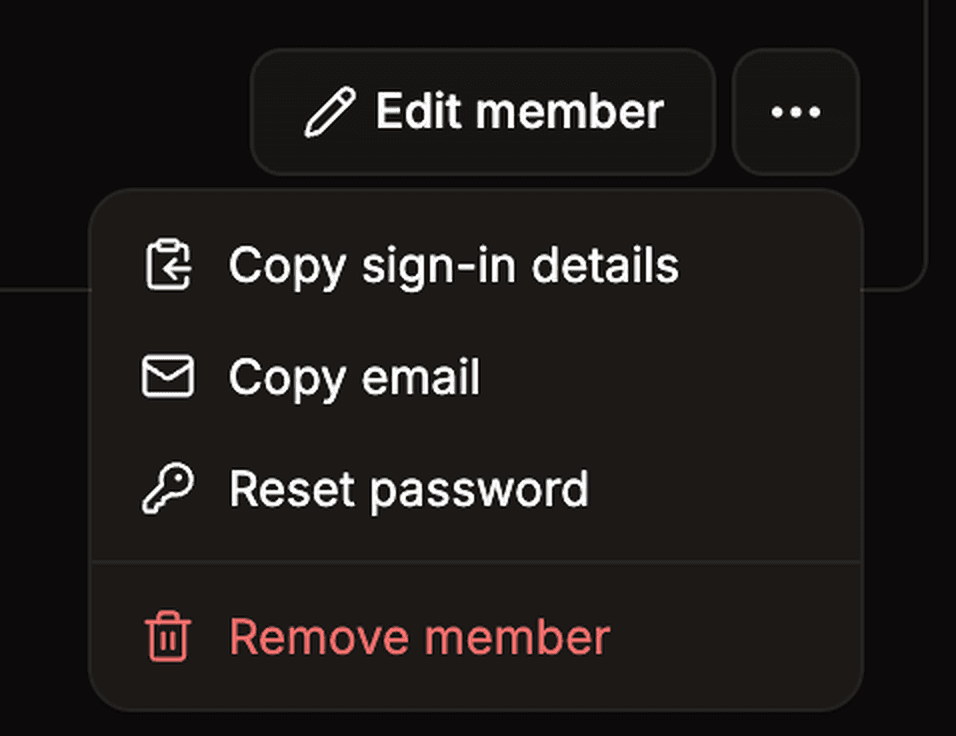
Copy sign-in details — a paste-ready message with their email and your workspace ID (never the password).
Reset password — set a new password for them. This signs them out of all their active sessions.
Remove member — access ends immediately and can’t be undone. Conversations and messages they handled stay safely in your workspace.
What team members can and can’t do
Area | What a team member can do |
|---|---|
Inbox | Read and reply to conversations on their allowed pages (when Inbox is on) |
Bulk messages | Create and send bulk messages on their allowed pages (when Campaigns is on) |
Facebook pages | See only the pages you ticked — leads and conversations included |
Billing | View the workspace message balance; only the owner can buy packages |
Connect Facebook | Not available — only the owner connects or disconnects Facebook |
Team | Not available — only the owner adds, edits, or removes members |
Their own profile | Change their own name and password; email changes are owner-only |
Notifications | Browser notifications and sounds for new messages on their allowed pages |
Troubleshooting team sign-in and access
Problem | Fix |
|---|---|
“Workspace ID, email, or password is incorrect.” | All three fields must match. Copy the workspace ID from your Team page, and make sure the member is on the team member sign-in page at /member/sign-in — not the owner sign-in page. |
A Facebook page is missing from the member’s view | That page isn’t ticked for them. Open Edit member and tick it under Page access. |
Bulk messages or Inbox is missing from the member’s menu | That module is switched off. Open Edit member and turn it on under What they can do. |
“Too many failed attempts. Try again later or reset your password.” | The account is temporarily locked after repeated wrong passwords. Wait a few minutes, or reset the password from the Team page. |
The member lost their password | Passwords are never stored or shown again. Use Reset password in the ⋯ menu, or have the member click Forgot your password? on their sign-in page. |
A “Confirm it’s you” box appears while you manage the team | That’s expected — team changes ask you to re-confirm with your password or authenticator code before they save. |
That’s it — your team can now share the workload without sharing your password. If your members will mostly answer chats, show them the unified inbox guide next. New to Page Interact yourself? Start with the getting started guide.